
The Plugin Store will be available with the release of the Memority Integration Tool (MIT) 3.0.0.
Memority plugins are ready-to-use configuration packages. You install them on a tenant from the Plugin Store of the Memority Integration Tool (MIT). You do not build a recurring configuration by hand: you fill in a short form, the plugin generates the matching configuration and data files in your tenant project, and you deploy them to your tenant with the usual MIT actions.
This page is the entry point for all plugins. It explains what plugins are, how the Plugin Store works, and the standard installation procedure that is common to every plugin. Each plugin has its own page for what is specific to it: prerequisites on the target system, parameters to collect, generated configuration, functional scope and troubleshooting.
What is a Memority plugin ?
A plugin is a package of configuration templates for a Memority tenant. When you install it, the Plugin Store generates and updates files directly in your tenant project (connectors, settings, rights, roles, resources, translations, and so on). You then import these files into your tenant.
Plugins are used to:
-
onboard an application with a standard, tested provisioning configuration (Active Directory, Entra ID, Google Workspace, and so on);
-
activate a platform feature on an existing tenant (Application Dimensions, platform activity monitoring, and so on);
-
speed up repetitive configuration that would otherwise be rebuilt on every project, such as creating a new identity type.
A plugin is not a black box. Everything it produces is plain configuration in your project, versioned in Git like the rest of your tenant. You can extend or adjust the generated configuration afterwards, and each plugin page lists the files that the plugin creates and updates.
Plugin vs. MIT plugin. MIT is itself an IntelliJ plugin. On this page, "plugin" always means a Memority configuration plugin installed from the Plugin Store, never the IntelliJ tool.
Prerequisites
The following prerequisites apply to every plugin. Each plugin page adds its own, for example a minimum presets version, an existing identity type, or a target system to configure beforehand.
|
Prerequisite |
Description |
|---|---|
|
IntelliJ IDEA with the Memority Integration Tool |
MIT is available for free on the JetBrains Marketplace. The Plugin Store requires MIT 3.0.0 or later. |
|
A tenant project initialized with MIT |
Plugins complete and update the configuration created when the project was initialized. Your project must therefore have been initialized with the Plugins → Initialize project action of MIT. |
|
Integrator access to the target tenants |
You need your integrator account to deploy the generated configuration on preprod and prod, and access to the administrator portal to create secrets. |
|
A configured target system |
Most connector plugins require a service account, an enabled API or a security configuration on the target side. When this applies, the plugin page describes it. |
Initialize project, the built-in plugin
Initialize project is itself a plugin, delivered with MIT. This action creates a new tenant project from a short form (tenant name, administrator first name, last name and email) and deploys the Memority default configuration. Every other plugin builds on top of what it produces. This is why an initialized project is a prerequisite for all of them.
The Plugin Store
Opening the Plugin Store
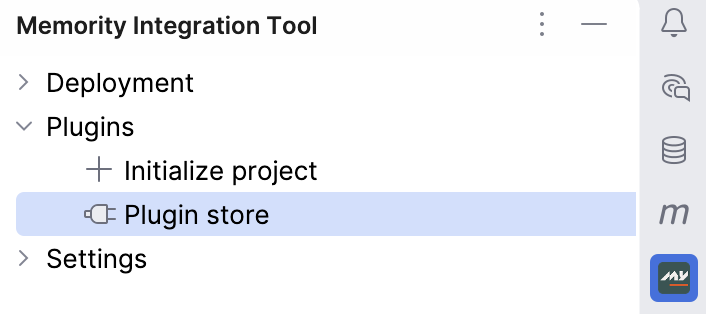
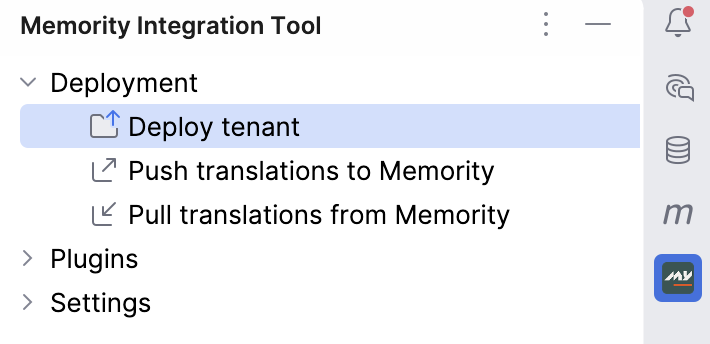
Open your tenant project in IntelliJ, then open the Memority Integration Tool panel on the right side of the IDE. The panel groups the MIT actions by family:
-
Deployment: Deploy tenant, Push translations to Memority, Pull translations from Memority
-
Plugins: Initialize project, Plugin store
-
Settings
Select Plugins → Plugin store to open the store.
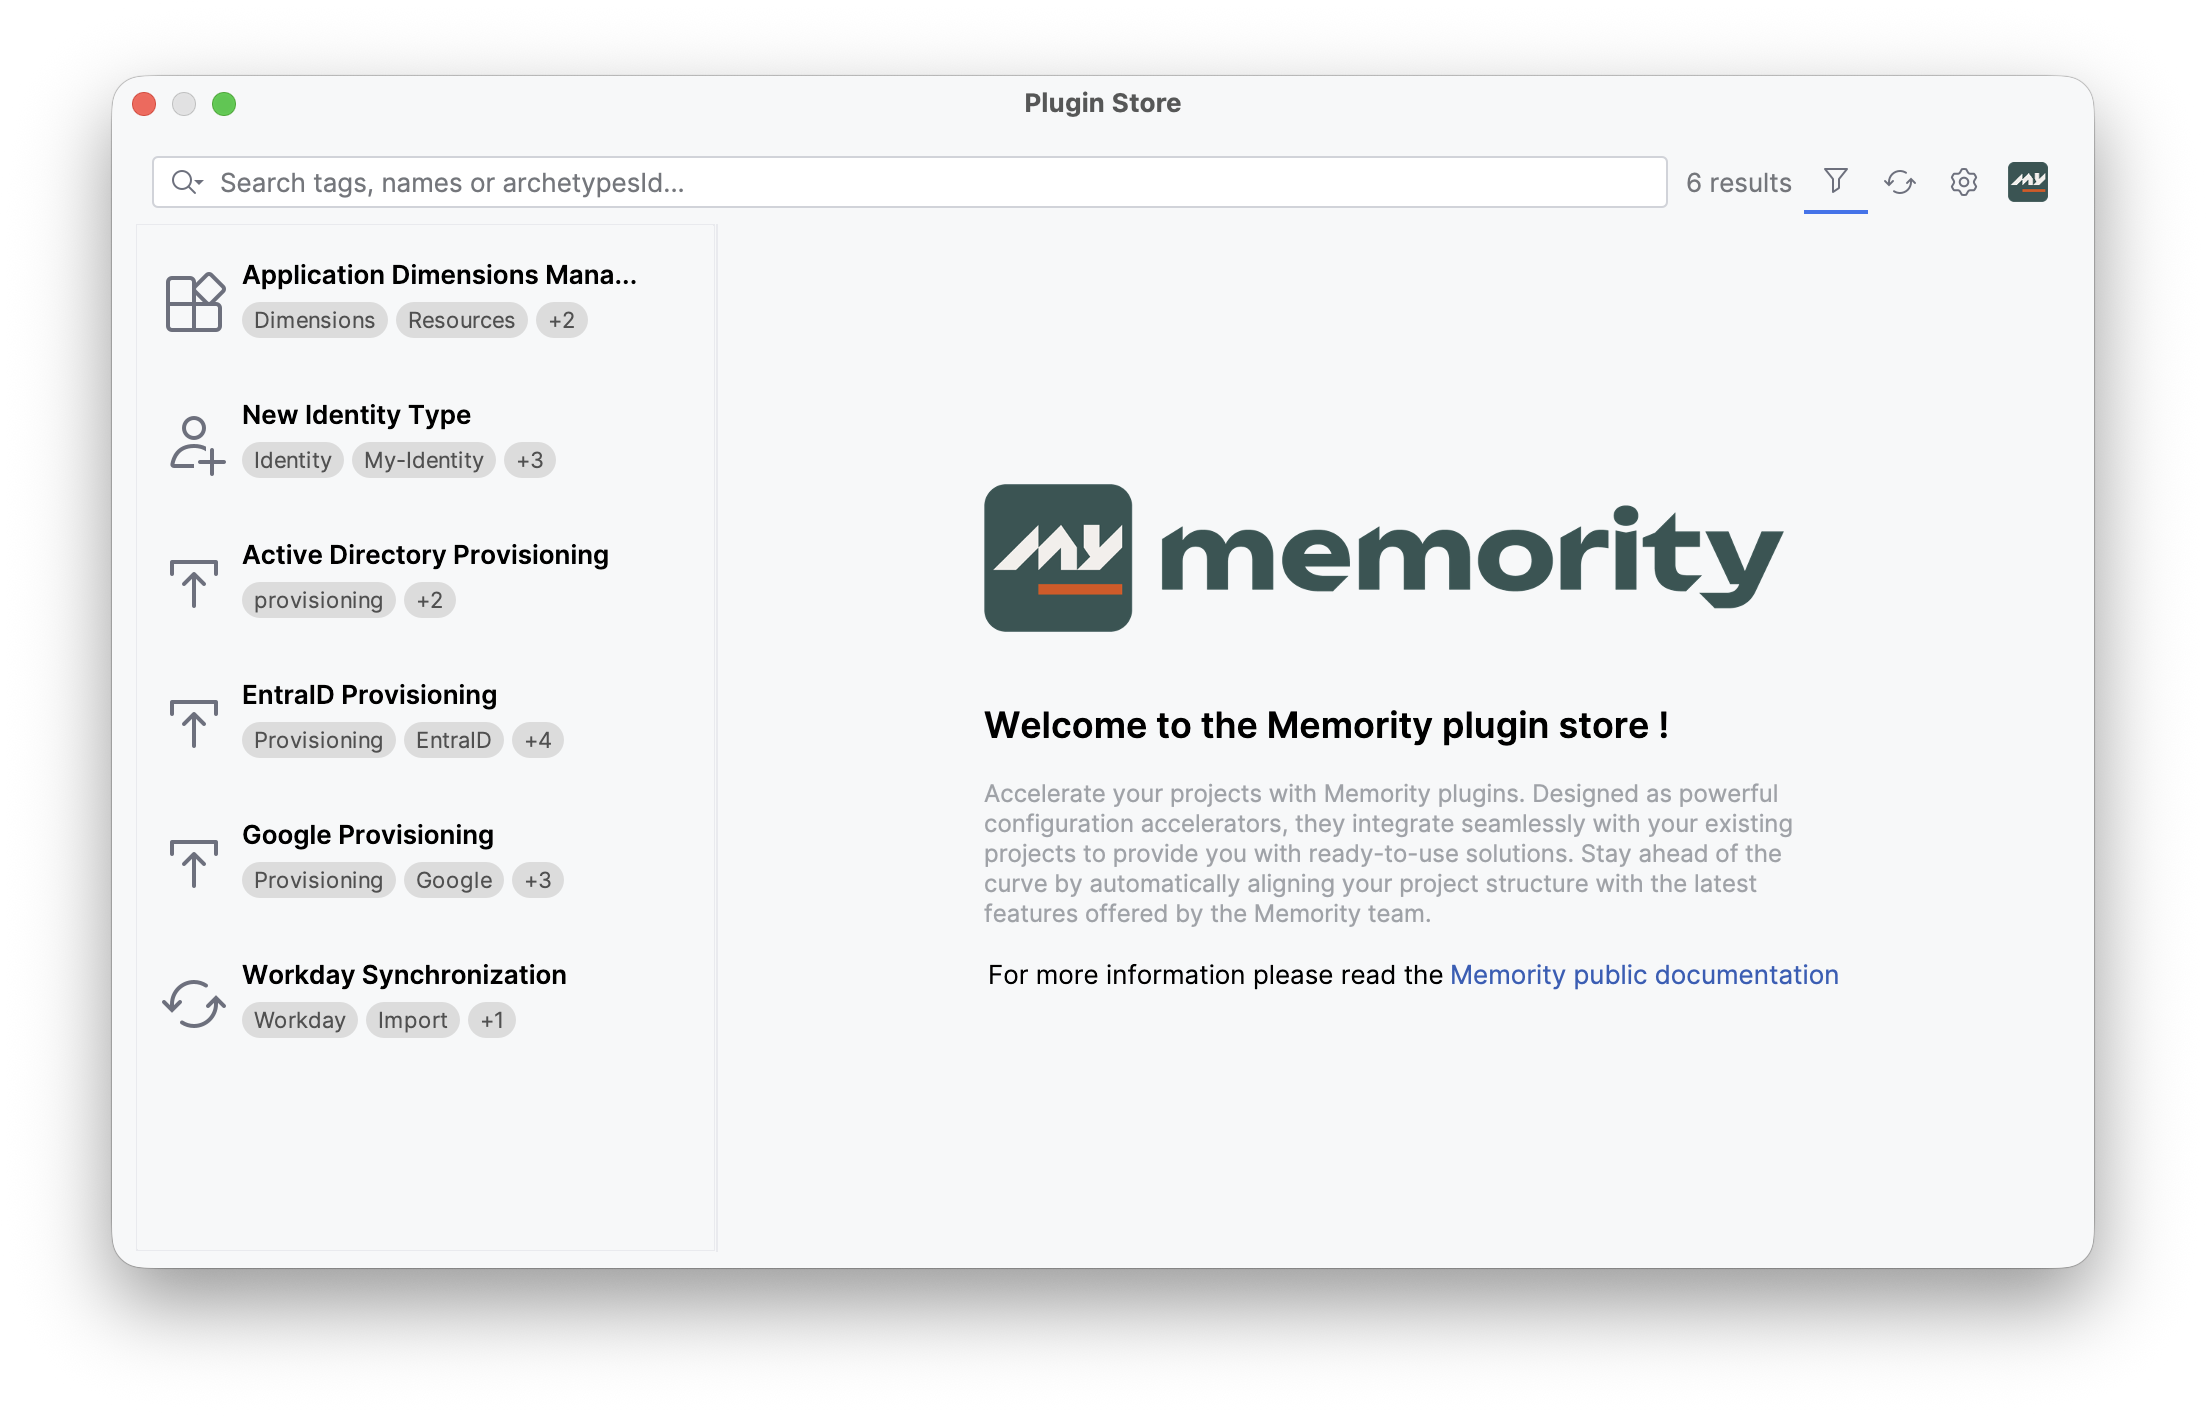
The plugin list
The Plugin Store opens on the catalog. The left column lists the plugins available for your project, each with its name and its tags.
-
The search field at the top filters the list on names, tags and technical identifiers.
-
The filter and refresh icons let you narrow the list and reload the catalog from its sources.
-
A check mark next to a plugin means that it is already installed on this project.
-
A grayed-out plugin name means that the plugin is already installed and cannot be installed again on this project.
Select a plugin to open its detail panel on the right.
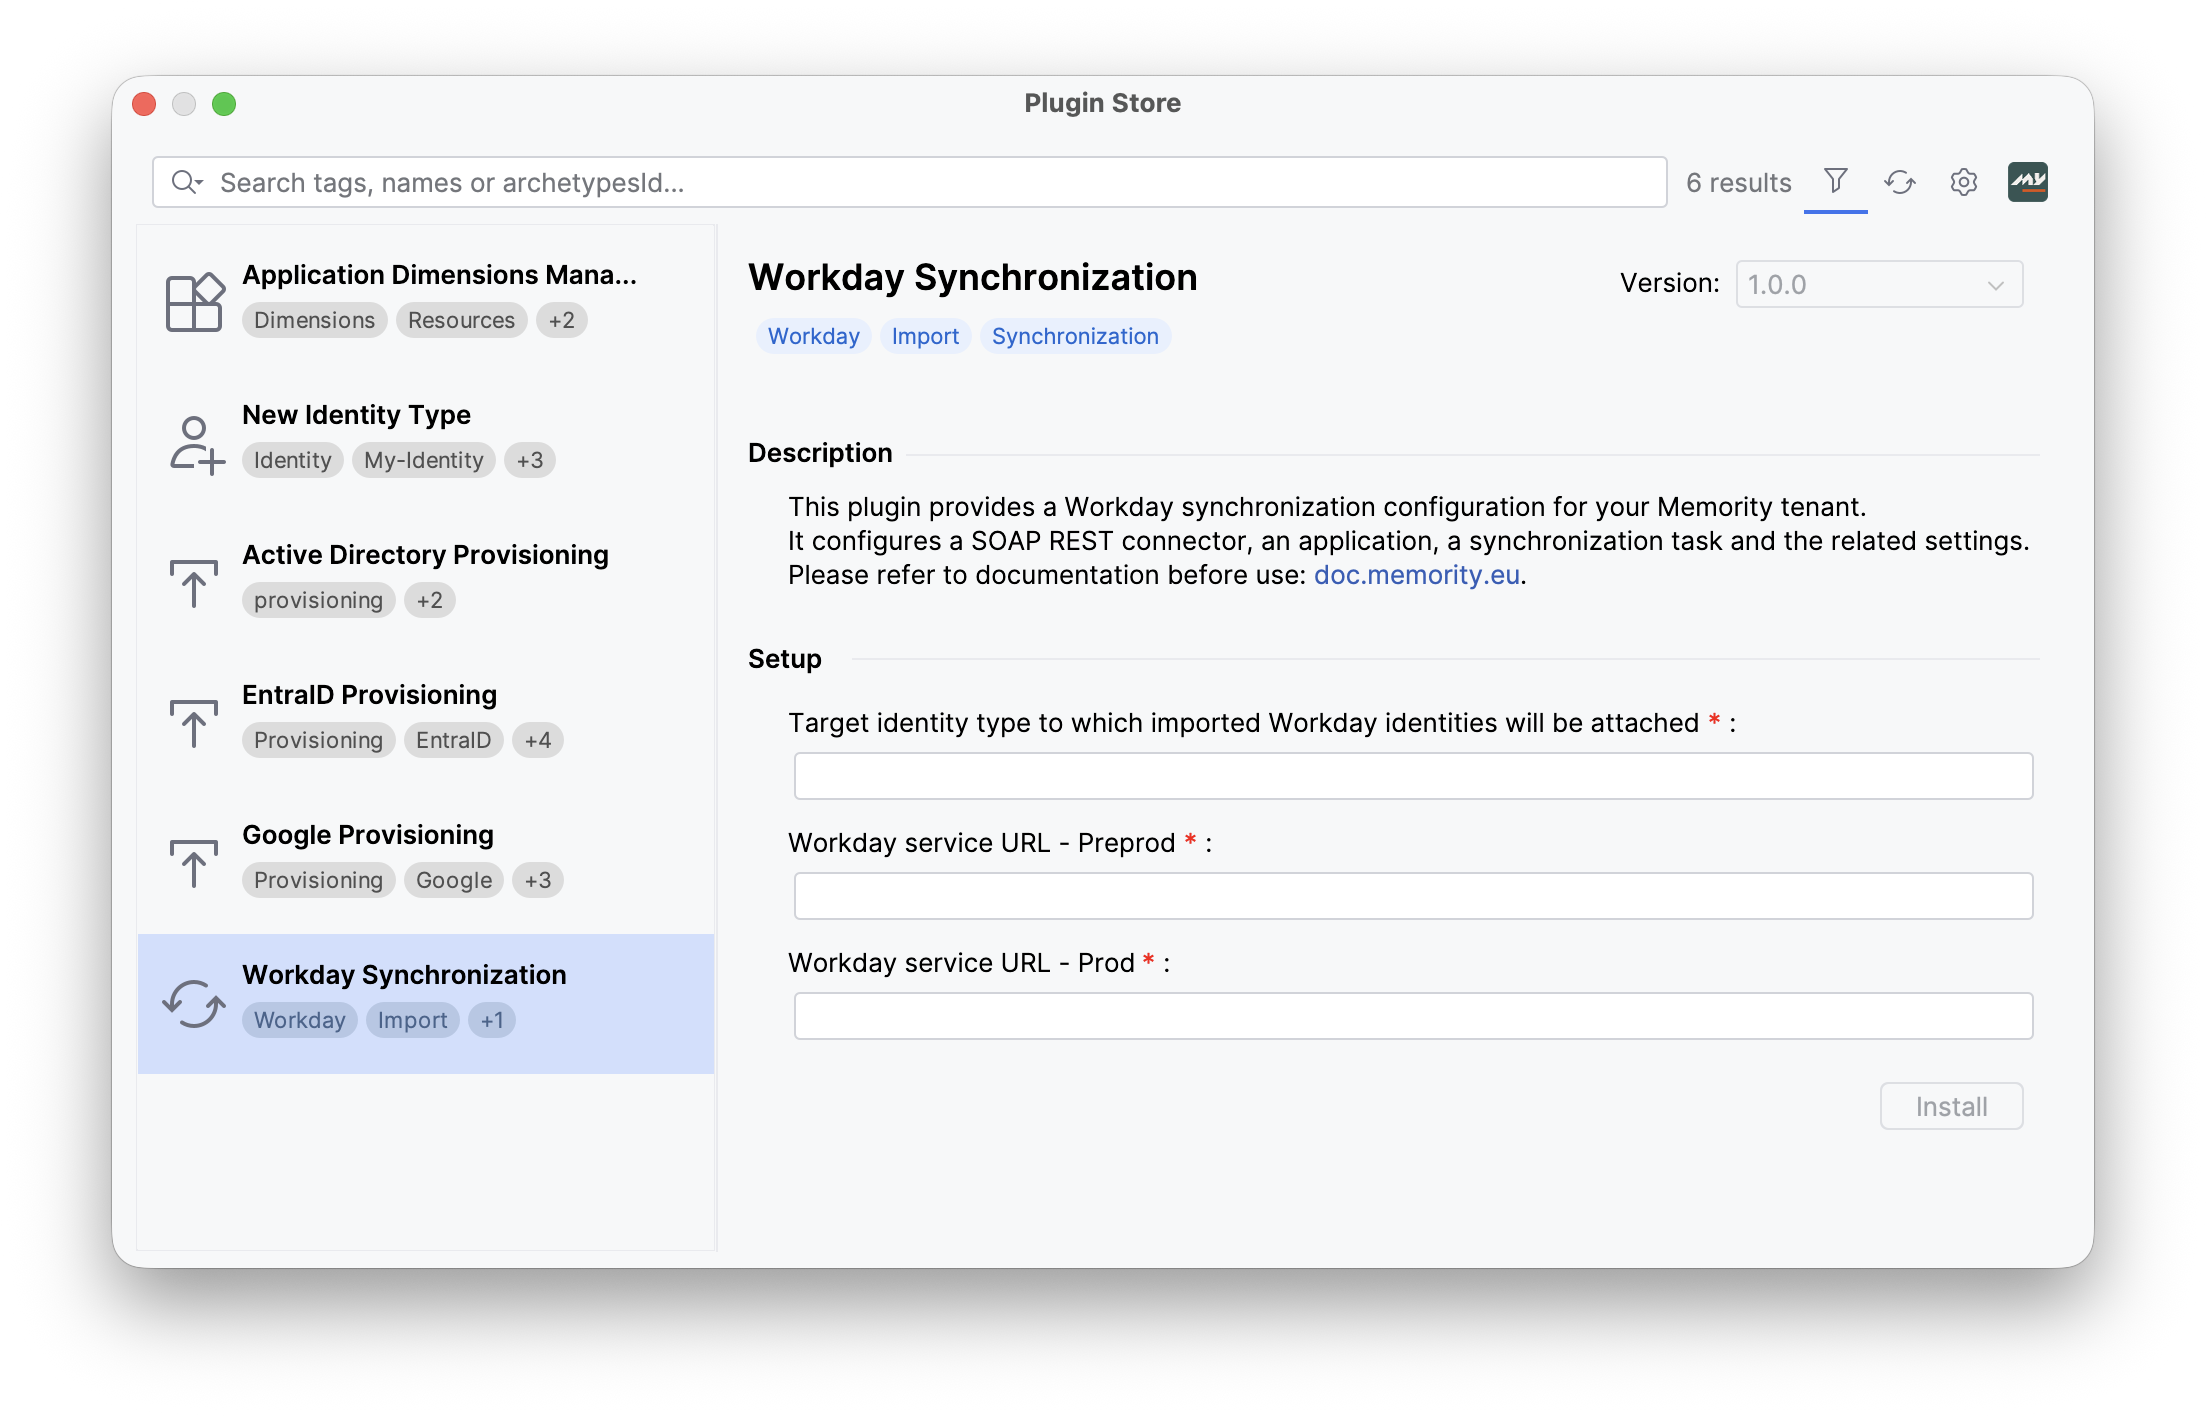
The plugin detail panel
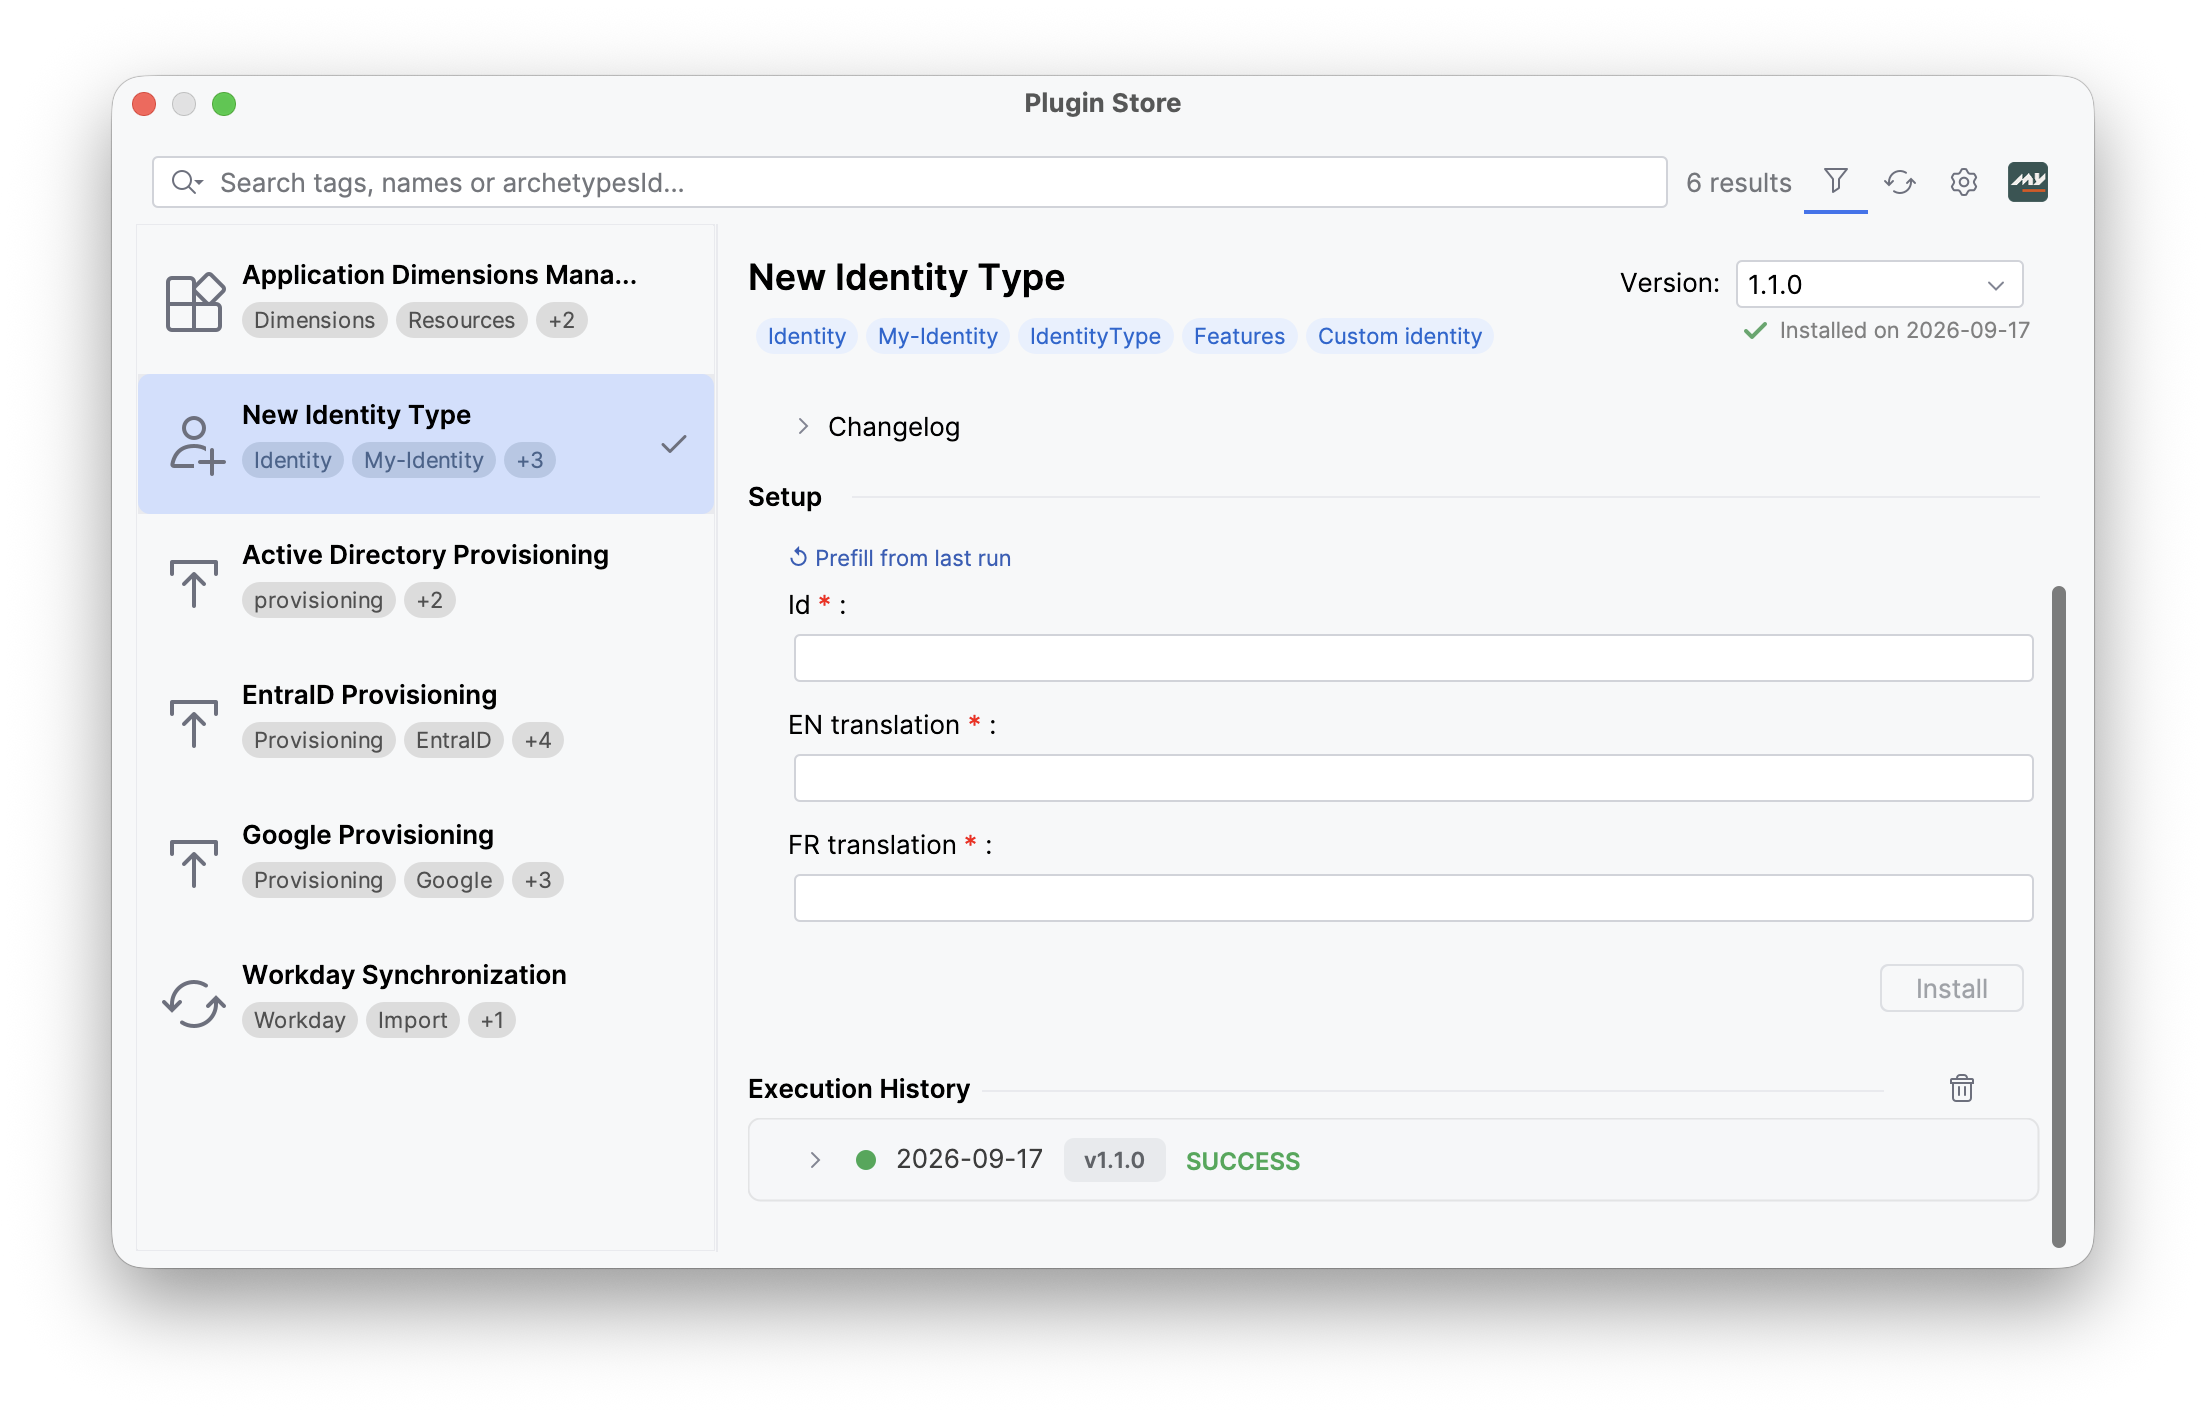
The detail panel contains everything you need to decide and to install:
|
Element |
What it tells you |
|---|---|
|
Title and tags |
The plugin name and its functional categories (for example provisioning, reporting). |
|
Version |
The version selector. The latest version is preselected. Previous versions remain available. |
|
Description |
What the plugin configures, and the link to its documentation page. Read it before installing. |
|
Changelog |
What changed between versions. |
|
Setup |
The form with the parameters to fill in. Mandatory fields are marked with a red asterisk. Most connector plugins ask for one value per environment, preprod and prod. |
|
Install |
Starts the installation. The button stays disabled until the form is valid. |
|
Installed on |
The installation date, when the plugin is already installed on this project. |
|
Execution History |
The list of past installations with their status (success or error), the version used and the submitted values. The trash icon clears the history (see the warning in Store settings). |
|
Conflict banner |
If the selected plugin is incompatible with a plugin already installed on the project, a banner is displayed at the top of the panel and installation is blocked. |
Form fields and validation
The parameter fields come from the plugin itself, so they differ from one plugin to another. Two rules always apply:
-
Fields are validated as you type. A field that does not match the expected format is highlighted, and installation stays blocked. For example, a DN must start with
CN=, a base DN withDC=, and a service URL must match the expected pattern of the target product. -
Secrets are never requested in the form. Passwords, private keys, client secrets and API credentials are never stored in the project. You create them manually in the Memority administrator portal after the installation, as described in step 7 of the standard procedure. Each plugin page gives the exact setting key and type to create.
Installation modes
Plugins do not all behave the same way when you install them several times on the same project. Each plugin page states which mode applies.
|
Mode |
Behavior |
|---|---|
|
Single installation |
The plugin can be installed only once. After installation, its form becomes read-only and the plugin is grayed out in the list: it cannot be installed again on this project. |
|
Repeatable with distinct values |
The plugin can be installed several times, provided that the values that identify each installation are different from the previous ones. The New Identity Type plugin is the typical example: you can install it as many times as you need, but each installation requires a different identity type identifier. |
|
Repeatable |
The plugin can be installed as many times as you want, with no restriction on the submitted values. |
Store settings
The gear icon at the top right opens the store settings.
|
Section |
Purpose |
|---|---|
|
API Filters |
The archetype group IDs (Maven groupId) that the store searches. The Memority group ID is set by default and locked. Add a group here only if you publish your own plugins (see Building your own plugins). |
|
Data Maintenance |
Clear all history removes the installation history recorded for the project. Installation checks (for example whether a single-installation plugin is already installed) rely on this history, so after clearing it the store considers that no plugin was ever installed. It does not remove the configuration files that the plugins already generated. Use it only to recover from a real problem with the store itself. If you clear the history and reinstall a plugin without first removing its generated files by hand, the Maven build fails because it cannot overwrite files that already exist. |
|
Advanced configuration |
The sources the store queries, and, if needed, an override of your Maven settings file and local repository. Keep the default configuration unless Memority asks you to change it. |
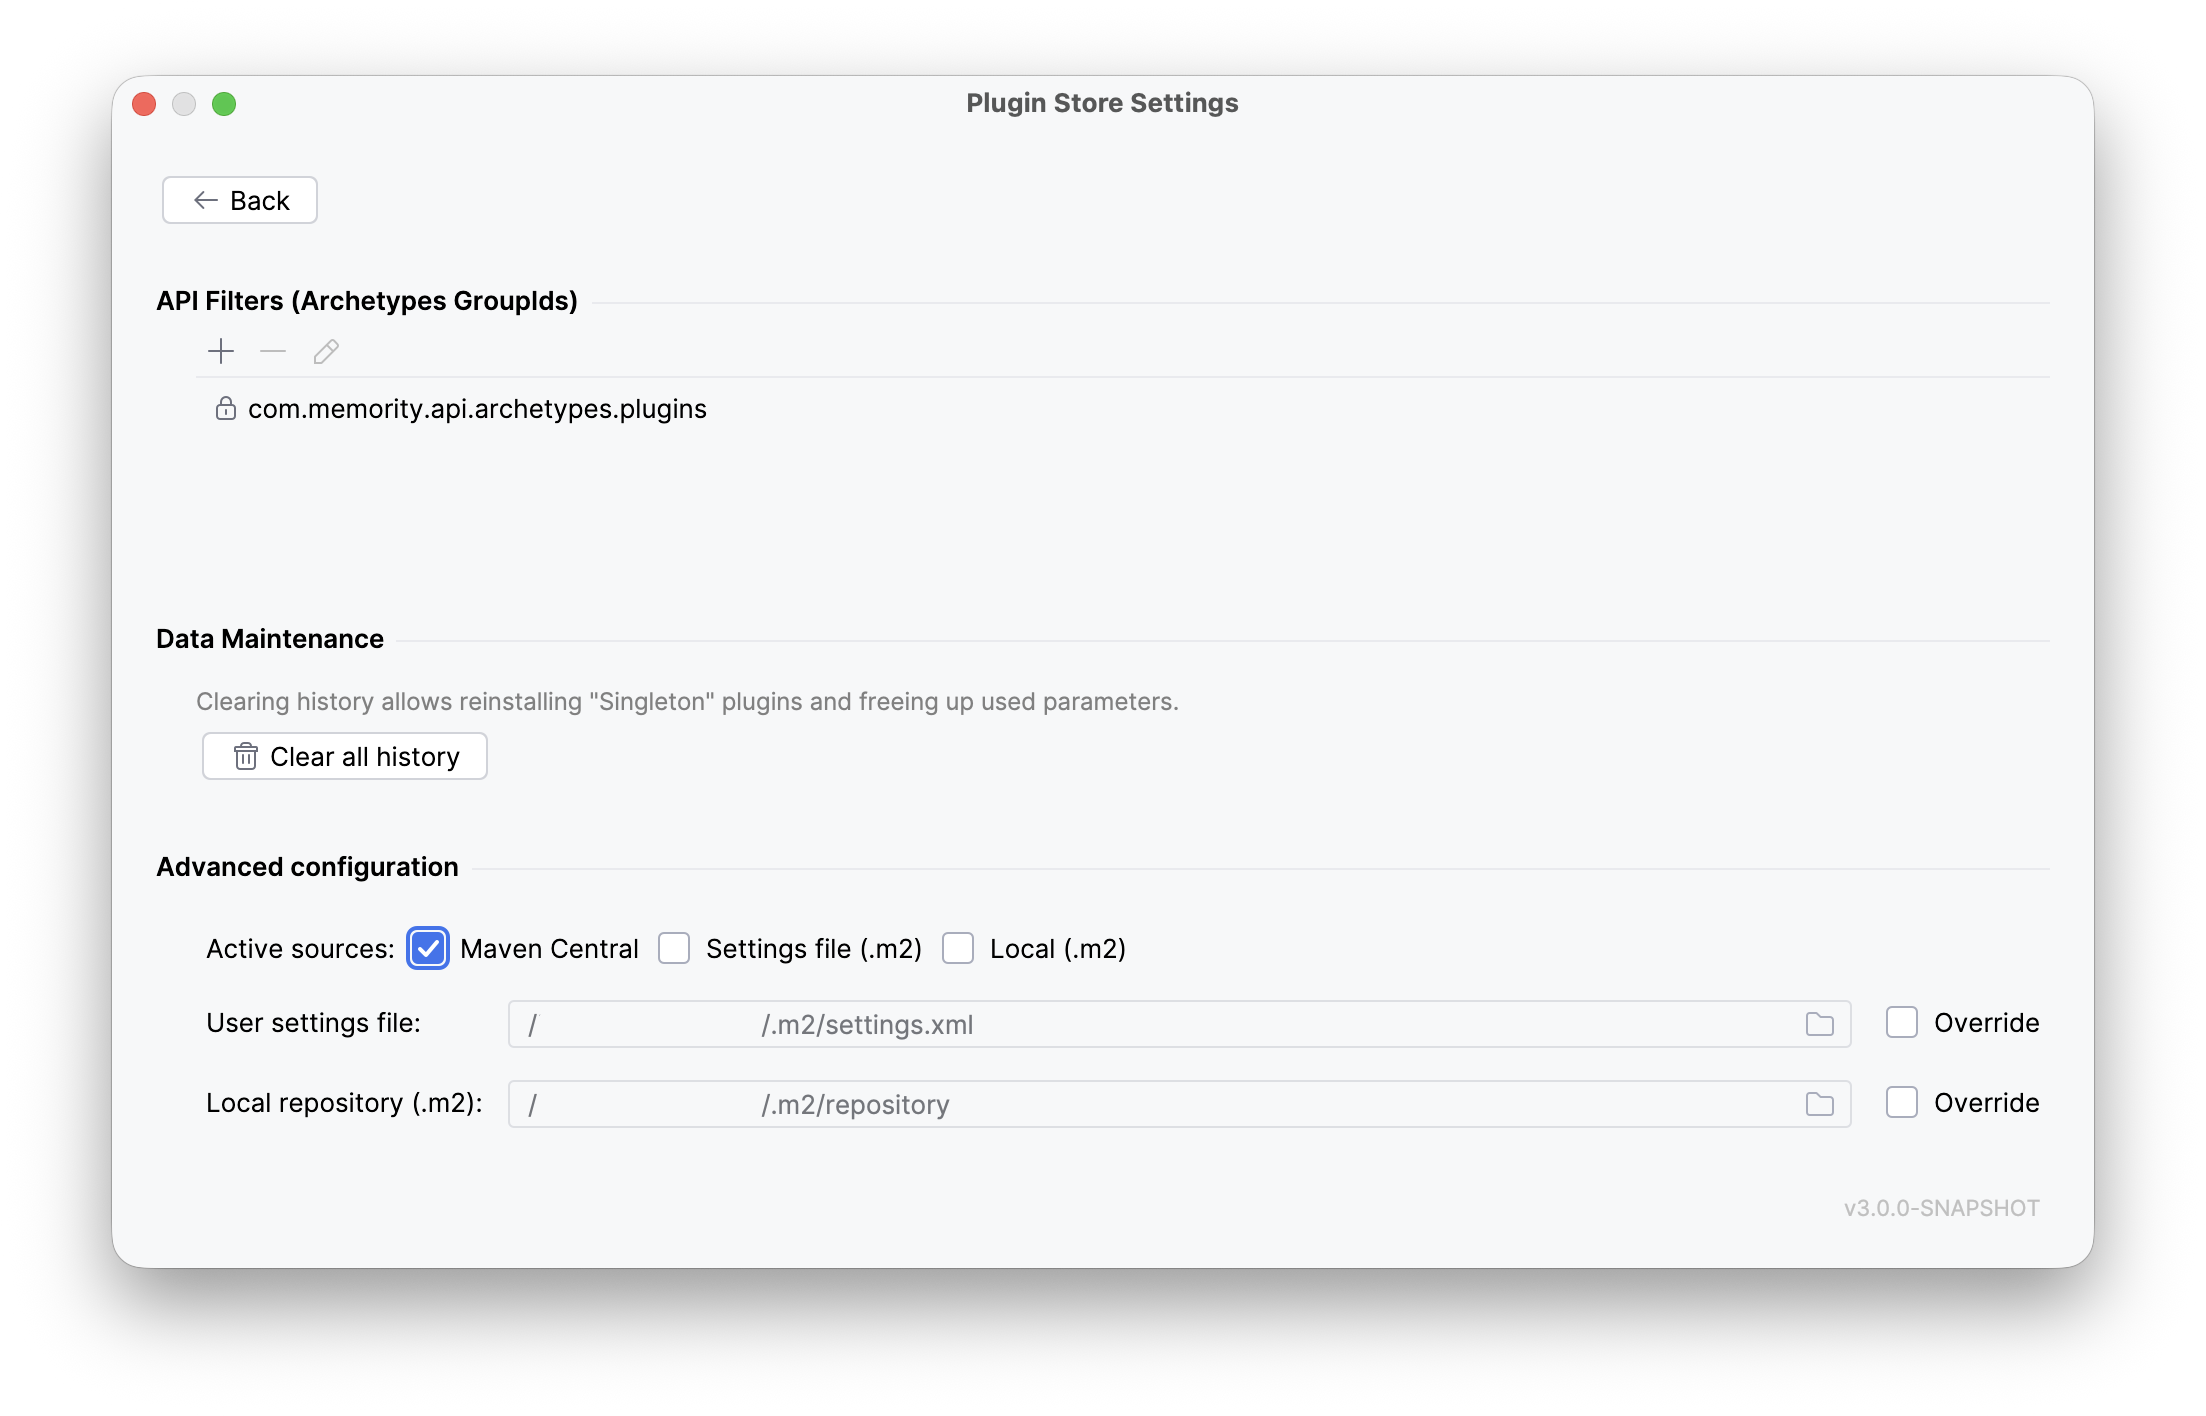
Save your changes. The settings screen has no Save button. Click Back when you are done to save your changes to the store settings of the project. If you leave the screen in any other way (for example by closing the store), your changes may be lost.
Where the store settings are stored
The Plugin Store settings and history are specific to each project, not global to your IDE. They are stored at the root of the project, in .idea/memority, in two files:
|
File |
Content |
|---|---|
|
|
The store configuration of the project: filters, active sources, Maven overrides. |
|
|
The installation history of the project: which plugin was installed, in which version, with which values and with which result. |
These two files are deliberately not excluded by the default .gitignore of the project. We recommend that you version them: everyone working on the same project then shares the same store configuration and the same installation history, and MIT behaves consistently for the whole team.
Building your own plugins
The Plugin Store is open. As an integrator, you can experiment and package your own plugins as partial Maven archetypes, following the same principles as the Memority plugins. To test them from the store:
-
Enable the Local (.m2) source, or the Settings file (.m2) source if you publish them to an internal Nexus.
-
Add the groupId that you chose to the API Filters.
Plugins published by Memority need none of these settings: they are available with the default configuration.
You build your own plugins on your own initiative and under your own responsibility. Memority does not provide support for the design, development or deployment of custom plugins, and does not handle support requests on this topic.
Installing a plugin: standard procedure
The procedure below applies to every plugin. Only the parameters of step 4, the secrets of step 7 and the data of step 10 depend on the plugin.
|
Step |
Details |
|
|---|---|---|
|
1 |
Collect the parameters |
Open the plugin page and collect every value it asks for, for both preprod and prod, before you start. Most parameters come from the administrator of the target system. |
|
2 |
Commit your work in progress |
Commit everything before installing, so that the plugin installation lands in your repository as a separate change set. |
|
3 |
Open the Plugin Store and select the plugin |
In the MIT panel, select Plugins → Plugin store, then click the plugin in the list. Check the version selected in the header, and read the description and the changelog. |
|
4 |
Fill in the form |
Enter the parameters in the Setup section. All fields marked with a red asterisk are mandatory. Values are validated as you type. |
|
5 |
Install and wait for the build |
Click Install. A Maven build runs in the background and its output is visible in the console. When it completes, MIT displays a notification and the result appears in the Execution History. |
|
6 |
Check the generated files |
The new and updated files appear in your project. Review them in your version control client, as you would for any configuration change. Each plugin page lists the files it generates and updates. |
|
7 |
Create the secrets in the administrator portal |
If the plugin uses a secret or a credential, create it manually in the Memority administrator portal, on each environment, under System → Settings → Synchronization Service. The plugin page gives the setting key and its type, for example |
|
8 |
Import the configuration |
Deploy the generated configuration with the MIT Deploy tenant action. |
|
9 |
Import the translations |
Send the generated labels to the tenant with Push translations to Memority. |
|
10 |
Import the data |
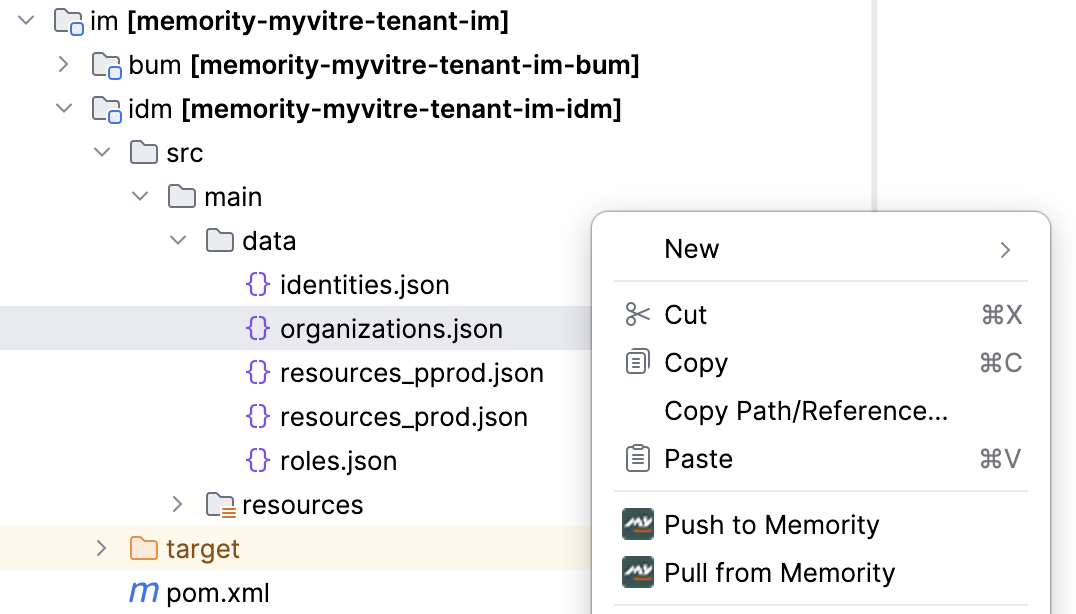
Some plugins also generate data files (resources, roles, licenses) in the data folder of the project. Push them with Push to Memority from the right-click menu, in the order given on the plugin page. As a general rule, import resources before roles. |
|
11 |
Verify, then commit the installation |
Check in the tenant that the expected objects are present, and run the functional checks listed on the plugin page. Once the result is validated, commit the installation on its own, with an explicit message such as "Install <plugin name> <version>". |
Good practices
-
Install on preprod first. Validate the behavior, then deploy the same configuration to production.
-
Isolate the installation in a dedicated commit. Commit everything before you install, install and validate, then commit again with nothing else in the change set. A plugin changes many files at once, and a dedicated commit is the simplest way to review it, share it and revert it if needed.
-
Version the Plugin Store files (
.idea/memority) so that the whole team shares the same store configuration and installation history. -
Do not rename the generated objects before your first successful deployment. It is easier to validate the standard configuration first, then adjust it.
-
Read the scope and limitations of the plugin on its page. Plugins cover a standard, deliberately limited scope. You configure anything beyond it manually afterwards.
Managing an installed plugin
Installing a newer version of a plugin
Upgrading a plugin that is already installed is not supported. For a single-installation plugin, the newer version is available for new projects only. On a project where the plugin is already installed, the version selector lets you read the changelog of the newer versions, but you cannot install the plugin again.
Moving an existing installation to a newer version would mean removing by hand the whole configuration generated by the previous version, then generating it again. This is not a supported procedure.
For a repeatable plugin, installing a newer version on a project where an older version is already installed has not been validated. We do not recommend it.
Removing a plugin
The Plugin Store does not uninstall plugins. A plugin generates configuration in your project, and removing this configuration is a regular configuration change: revert the commit that contains the installation, or delete the generated files, then redeploy. Note that rolling back the project does not remove the objects already created in the tenant, nor the data that references them.
Troubleshooting
|
Symptom |
What to check |
|---|---|
|
There is no Plugin store entry in the MIT panel. |
The Plugin Store requires MIT 3.0.0 or later. Update MIT from the JetBrains Marketplace. |
|
The plugin list is empty, or the installation fails with a "Plugin not found" error. |
The store cannot reach its sources. Use the refresh icon, then check the sources in the store settings and your network access. |
|
The expected plugin is not in the list. |
Clear the search field and the filters, then refresh. If it still does not appear, the plugin is most likely not available yet. |
|
The plugin name is grayed out and Install is disabled. |
The plugin is already installed on this project, and it can only be installed once. |
|
A banner is displayed at the top of the detail panel. |
The plugin conflicts with a plugin already installed on the project. The banner names the incompatibility. Installation is blocked until it is resolved. |
|
Install stays disabled although the form looks complete. |
At least one field is invalid. Check the fields marked in red and the expected formats documented on the plugin page. |
|
The installation ends in error. |
Open the console first: it contains the full build output, which usually points directly at the cause. The entry in the Execution History also shows the submitted values. |
|
The configuration is deployed but nothing works on the target. |
Debug on the tenant to find where the failure comes from, starting with the synchronization reports and the connector logs. A wrong secret or credential (step 7) is a frequent cause. If the analysis shows that the configuration generated by the plugin is at fault, report it to Memority so that we can correct the plugin. |
|
Objects are missing after a data import. |
The import order was not respected. Import resources before roles, and follow the order given on the plugin page. |